
 How to Master the Tie-Dye Swirl T-shirt
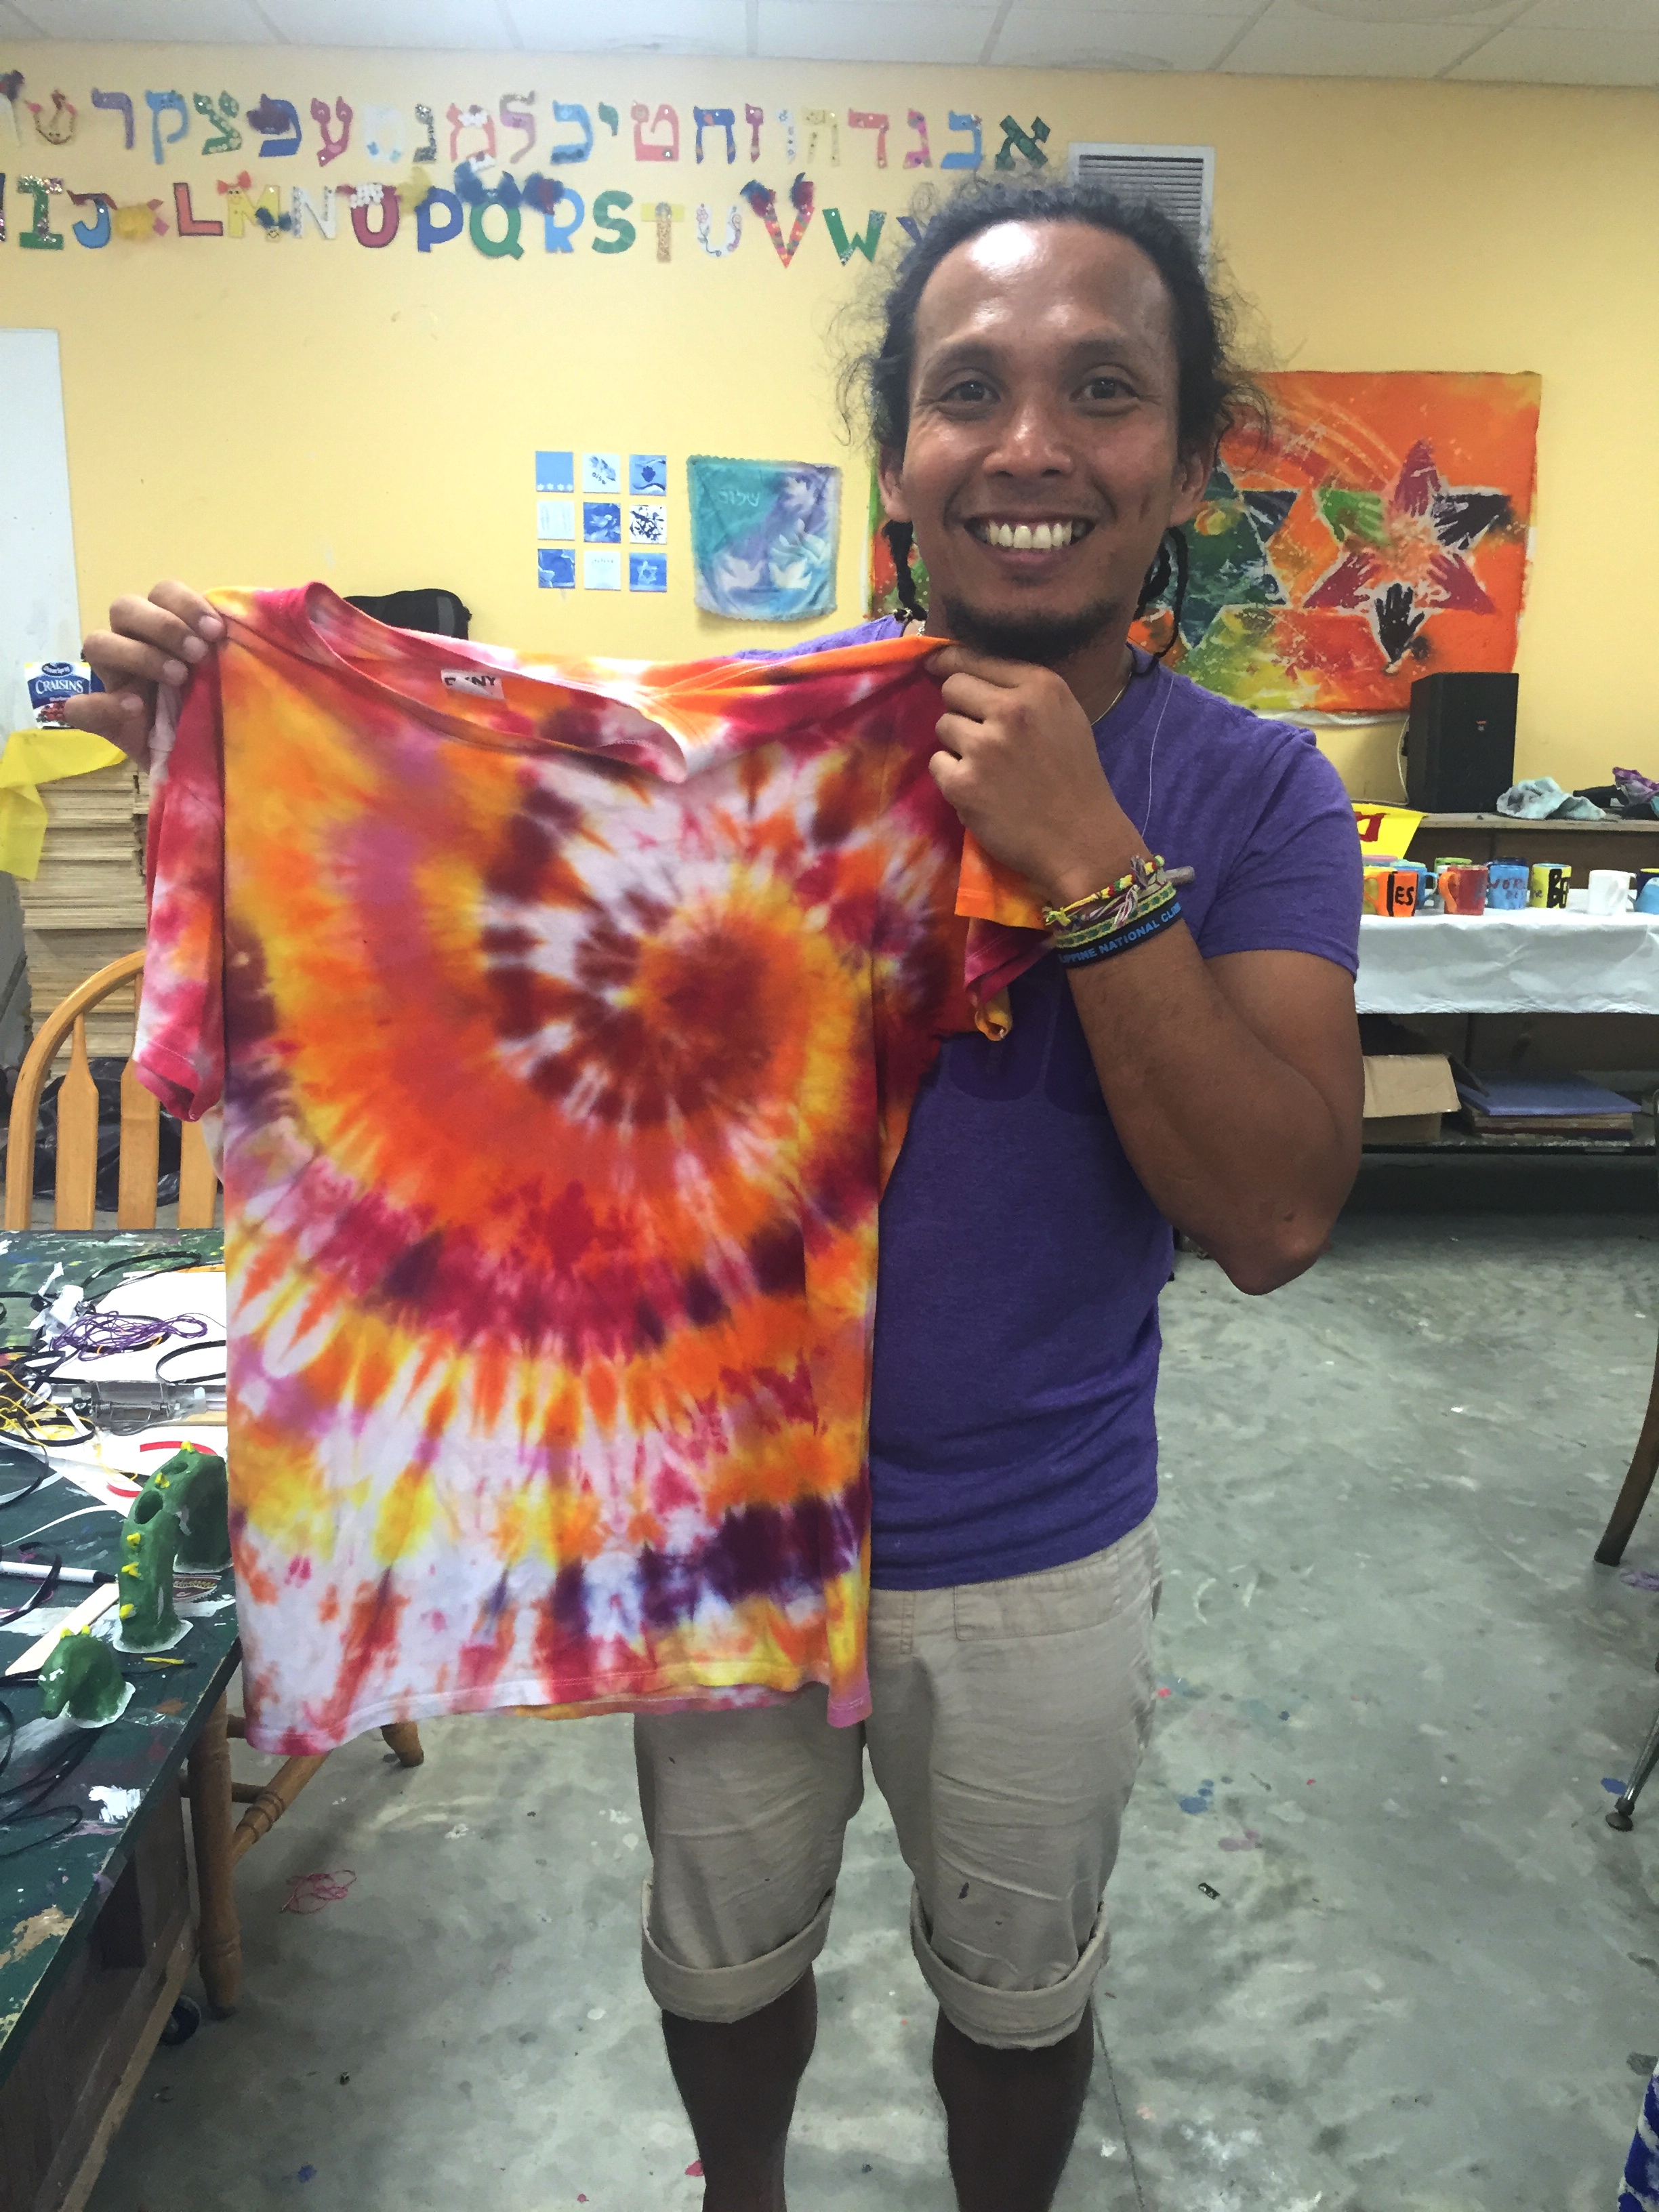
As told by Nino Hernandez, Arts & Crafts Director
Items needed:
- white shirt
- gloves
- drip tray
- fixer (soda ash & water)
- rubber bands
- dye color (dye & water & urea) in squeeze bottles
- plastic bag
 Tie-Dye in 10 easy steps!
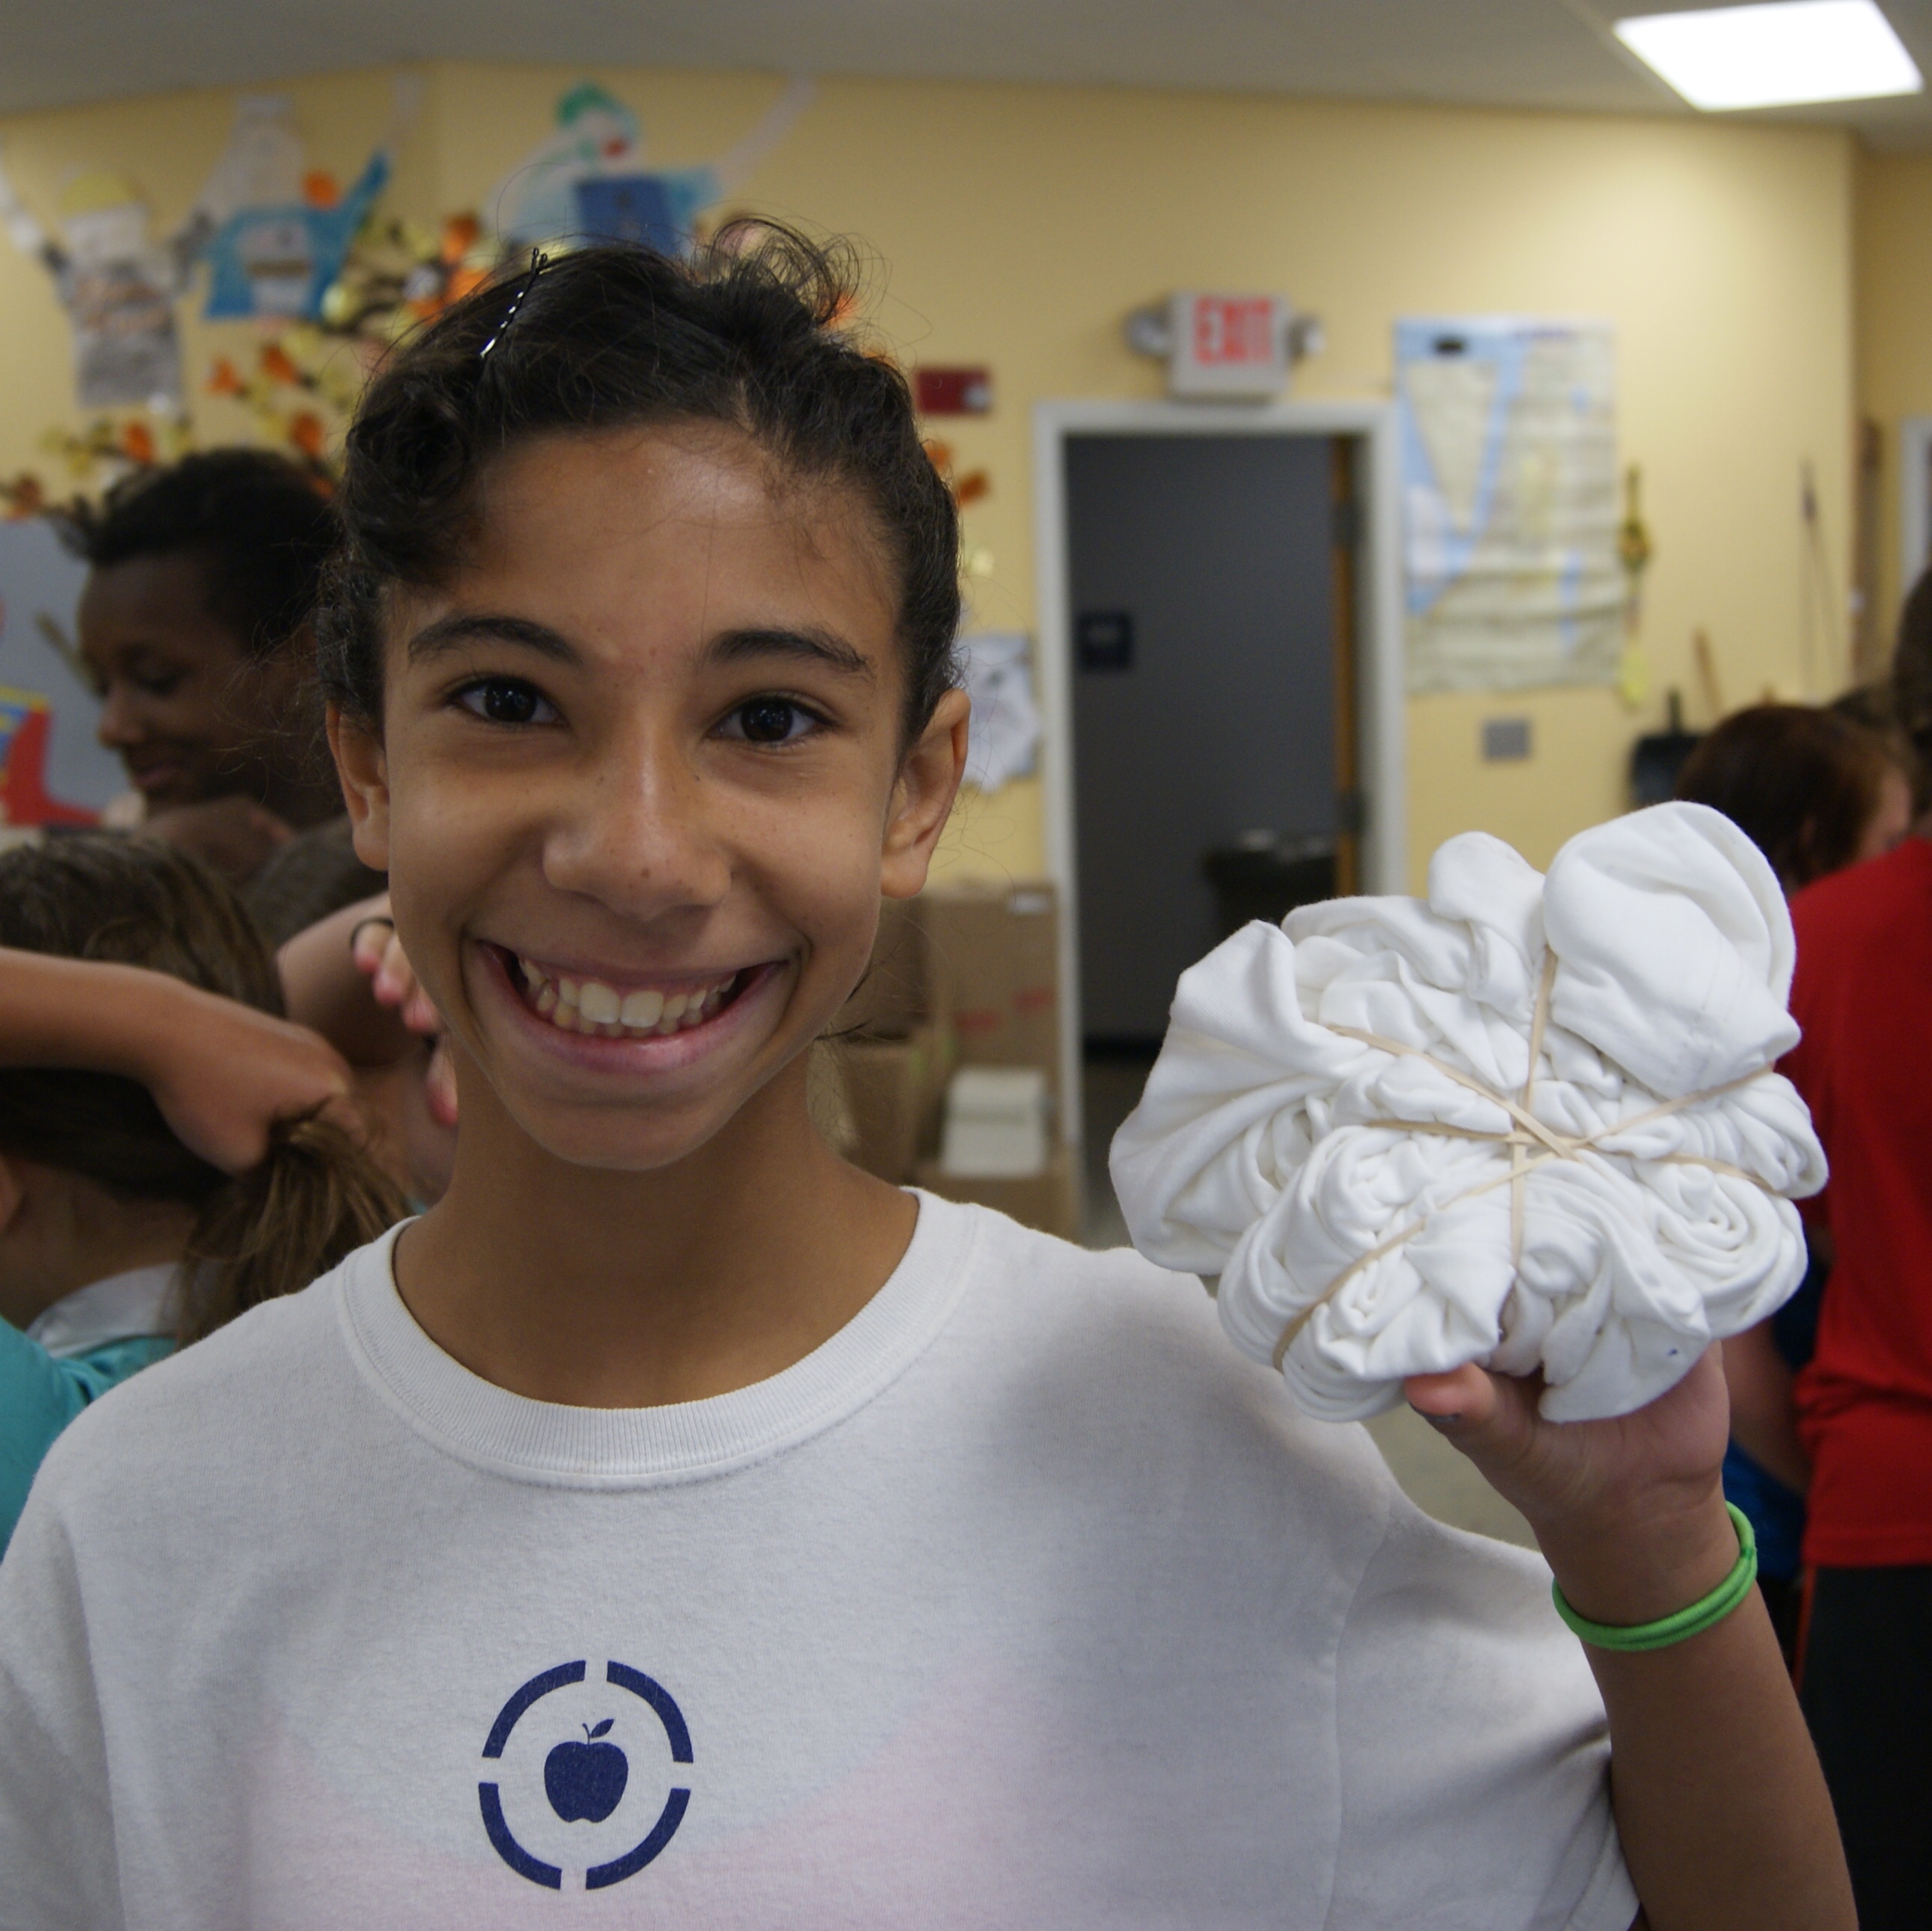
Step 1: Spread your shirt out and pinch it wherever you’d like the center to be. Then, twist the shirt as if you’re making a cinnamon roll.
Step 2: Use rubber bands to wrap the shirt, so it looks like a pizza pie.
Step 3: Soak your shirt in fixer (soda ash & water) for 15 minutes or more! This help the shirt keep the dye.
Step 4: Squeeze out excess fixer and place the shirt on 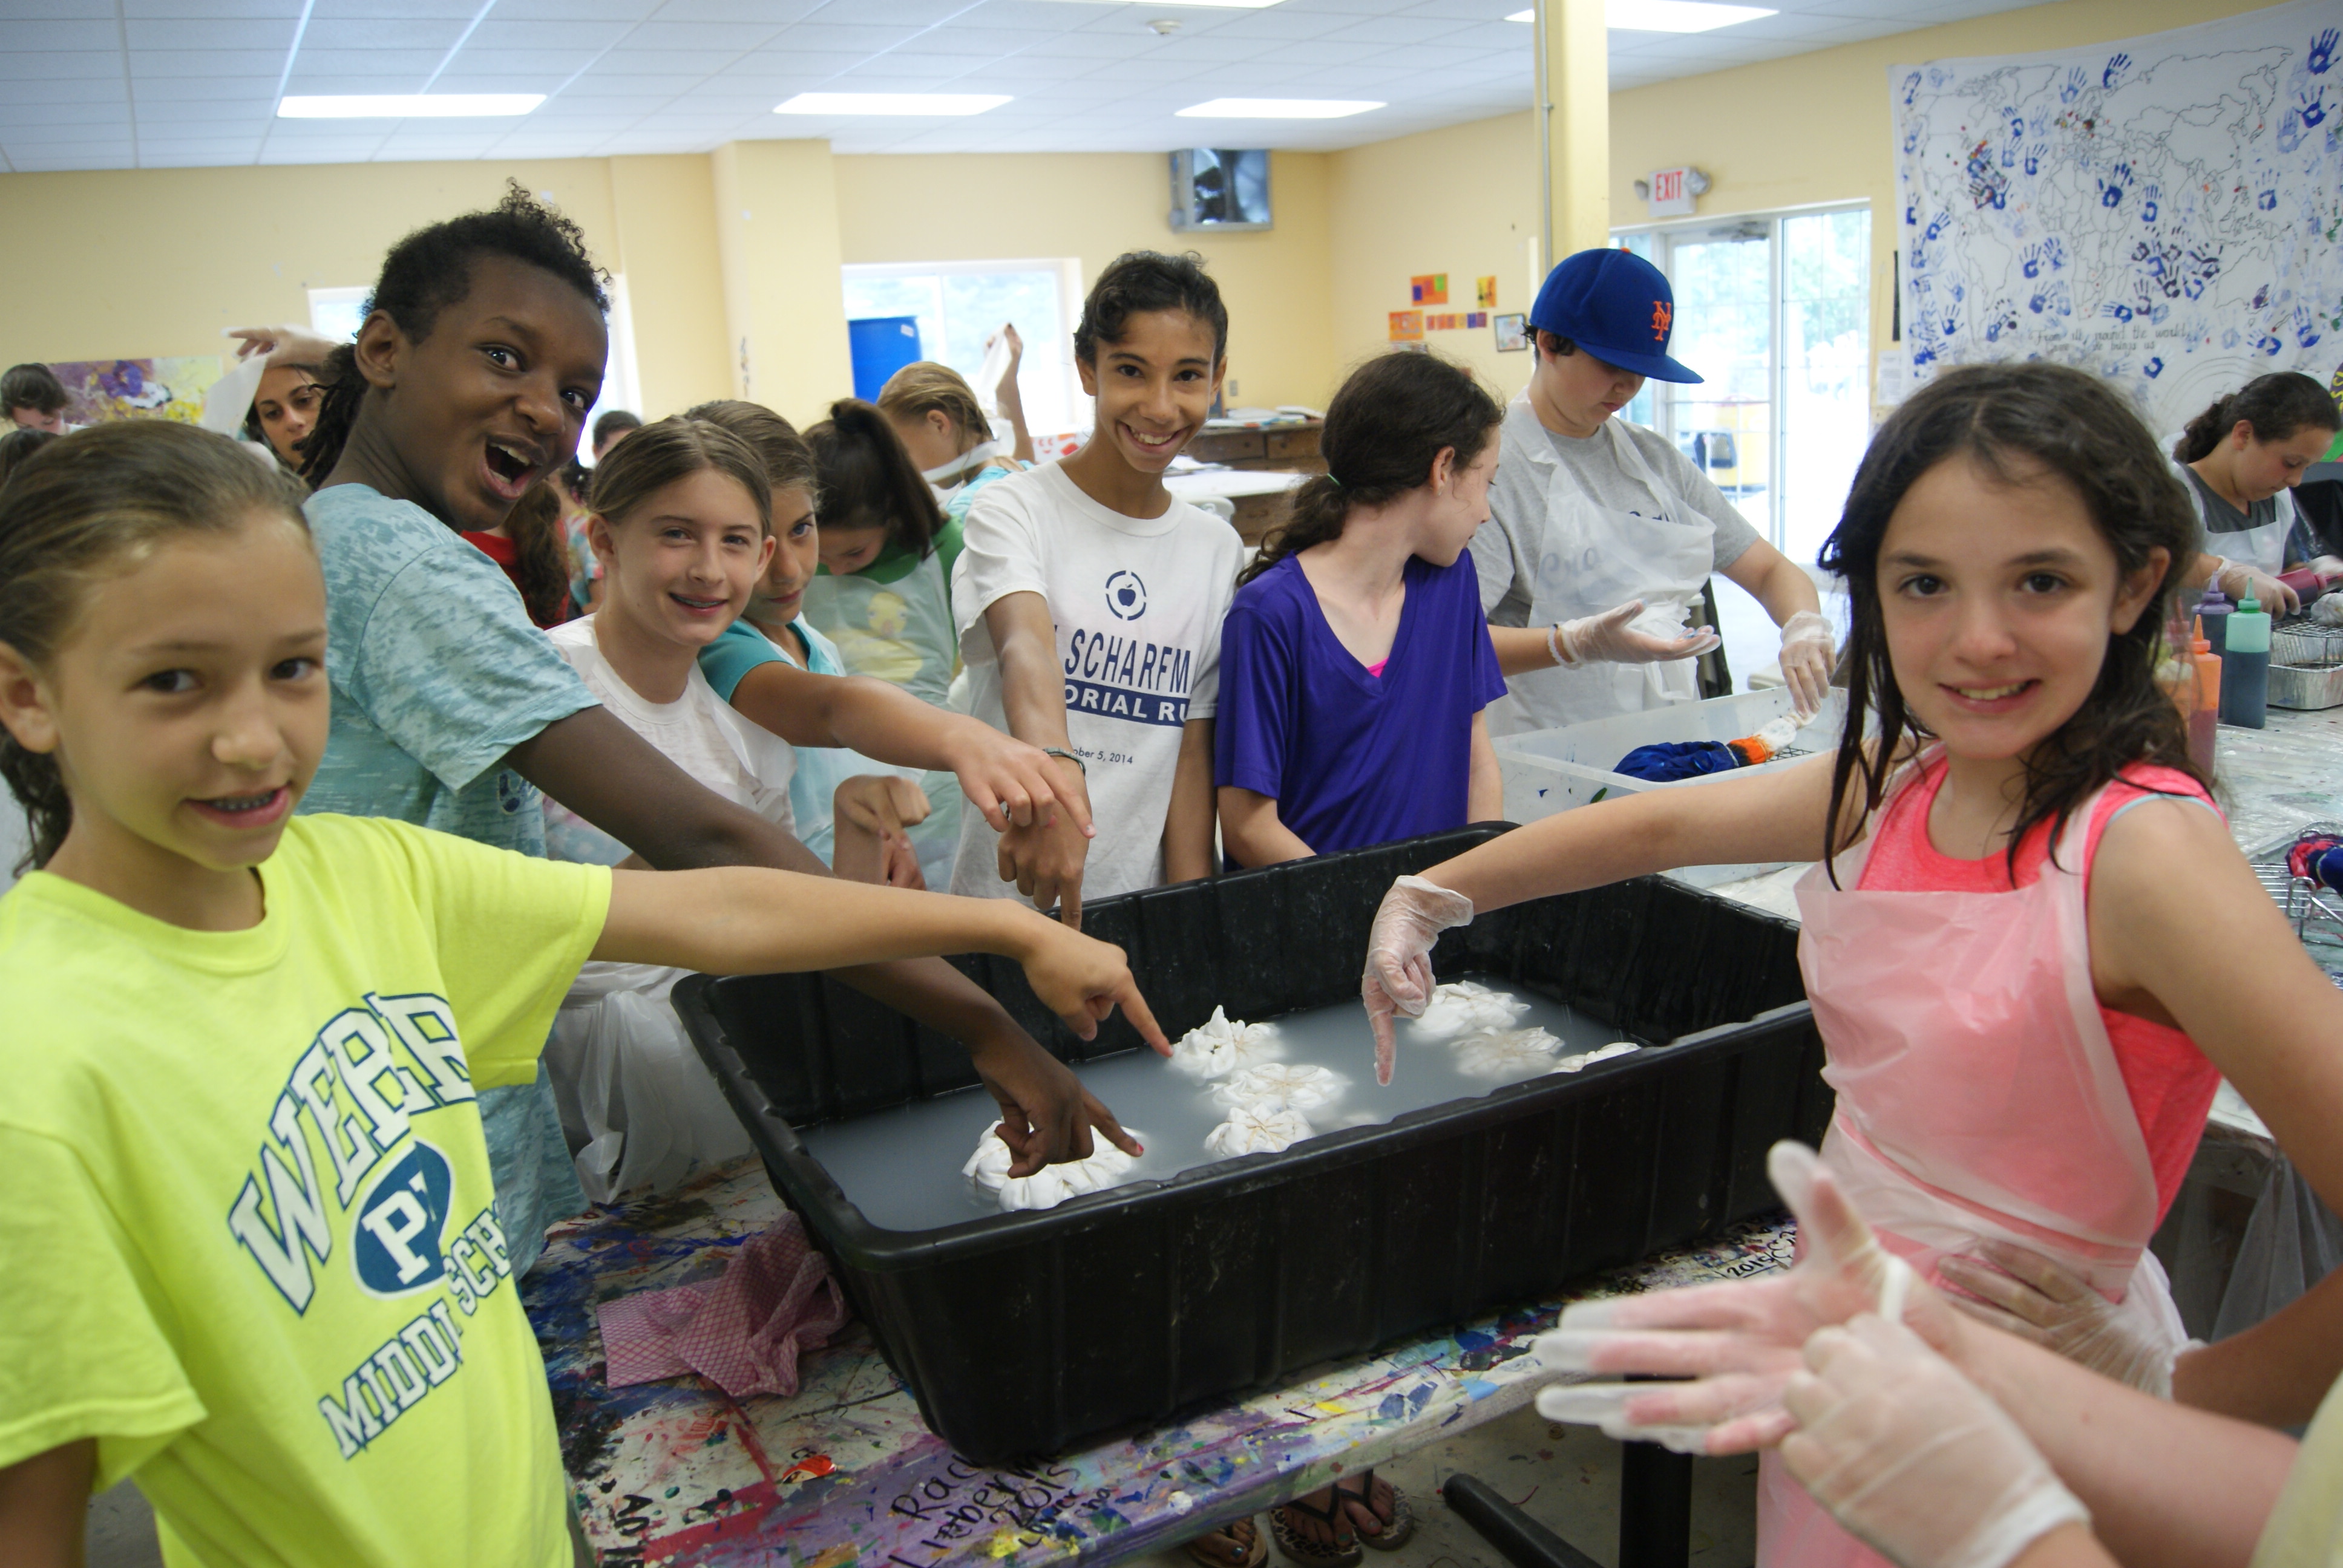 top of a drip tray.
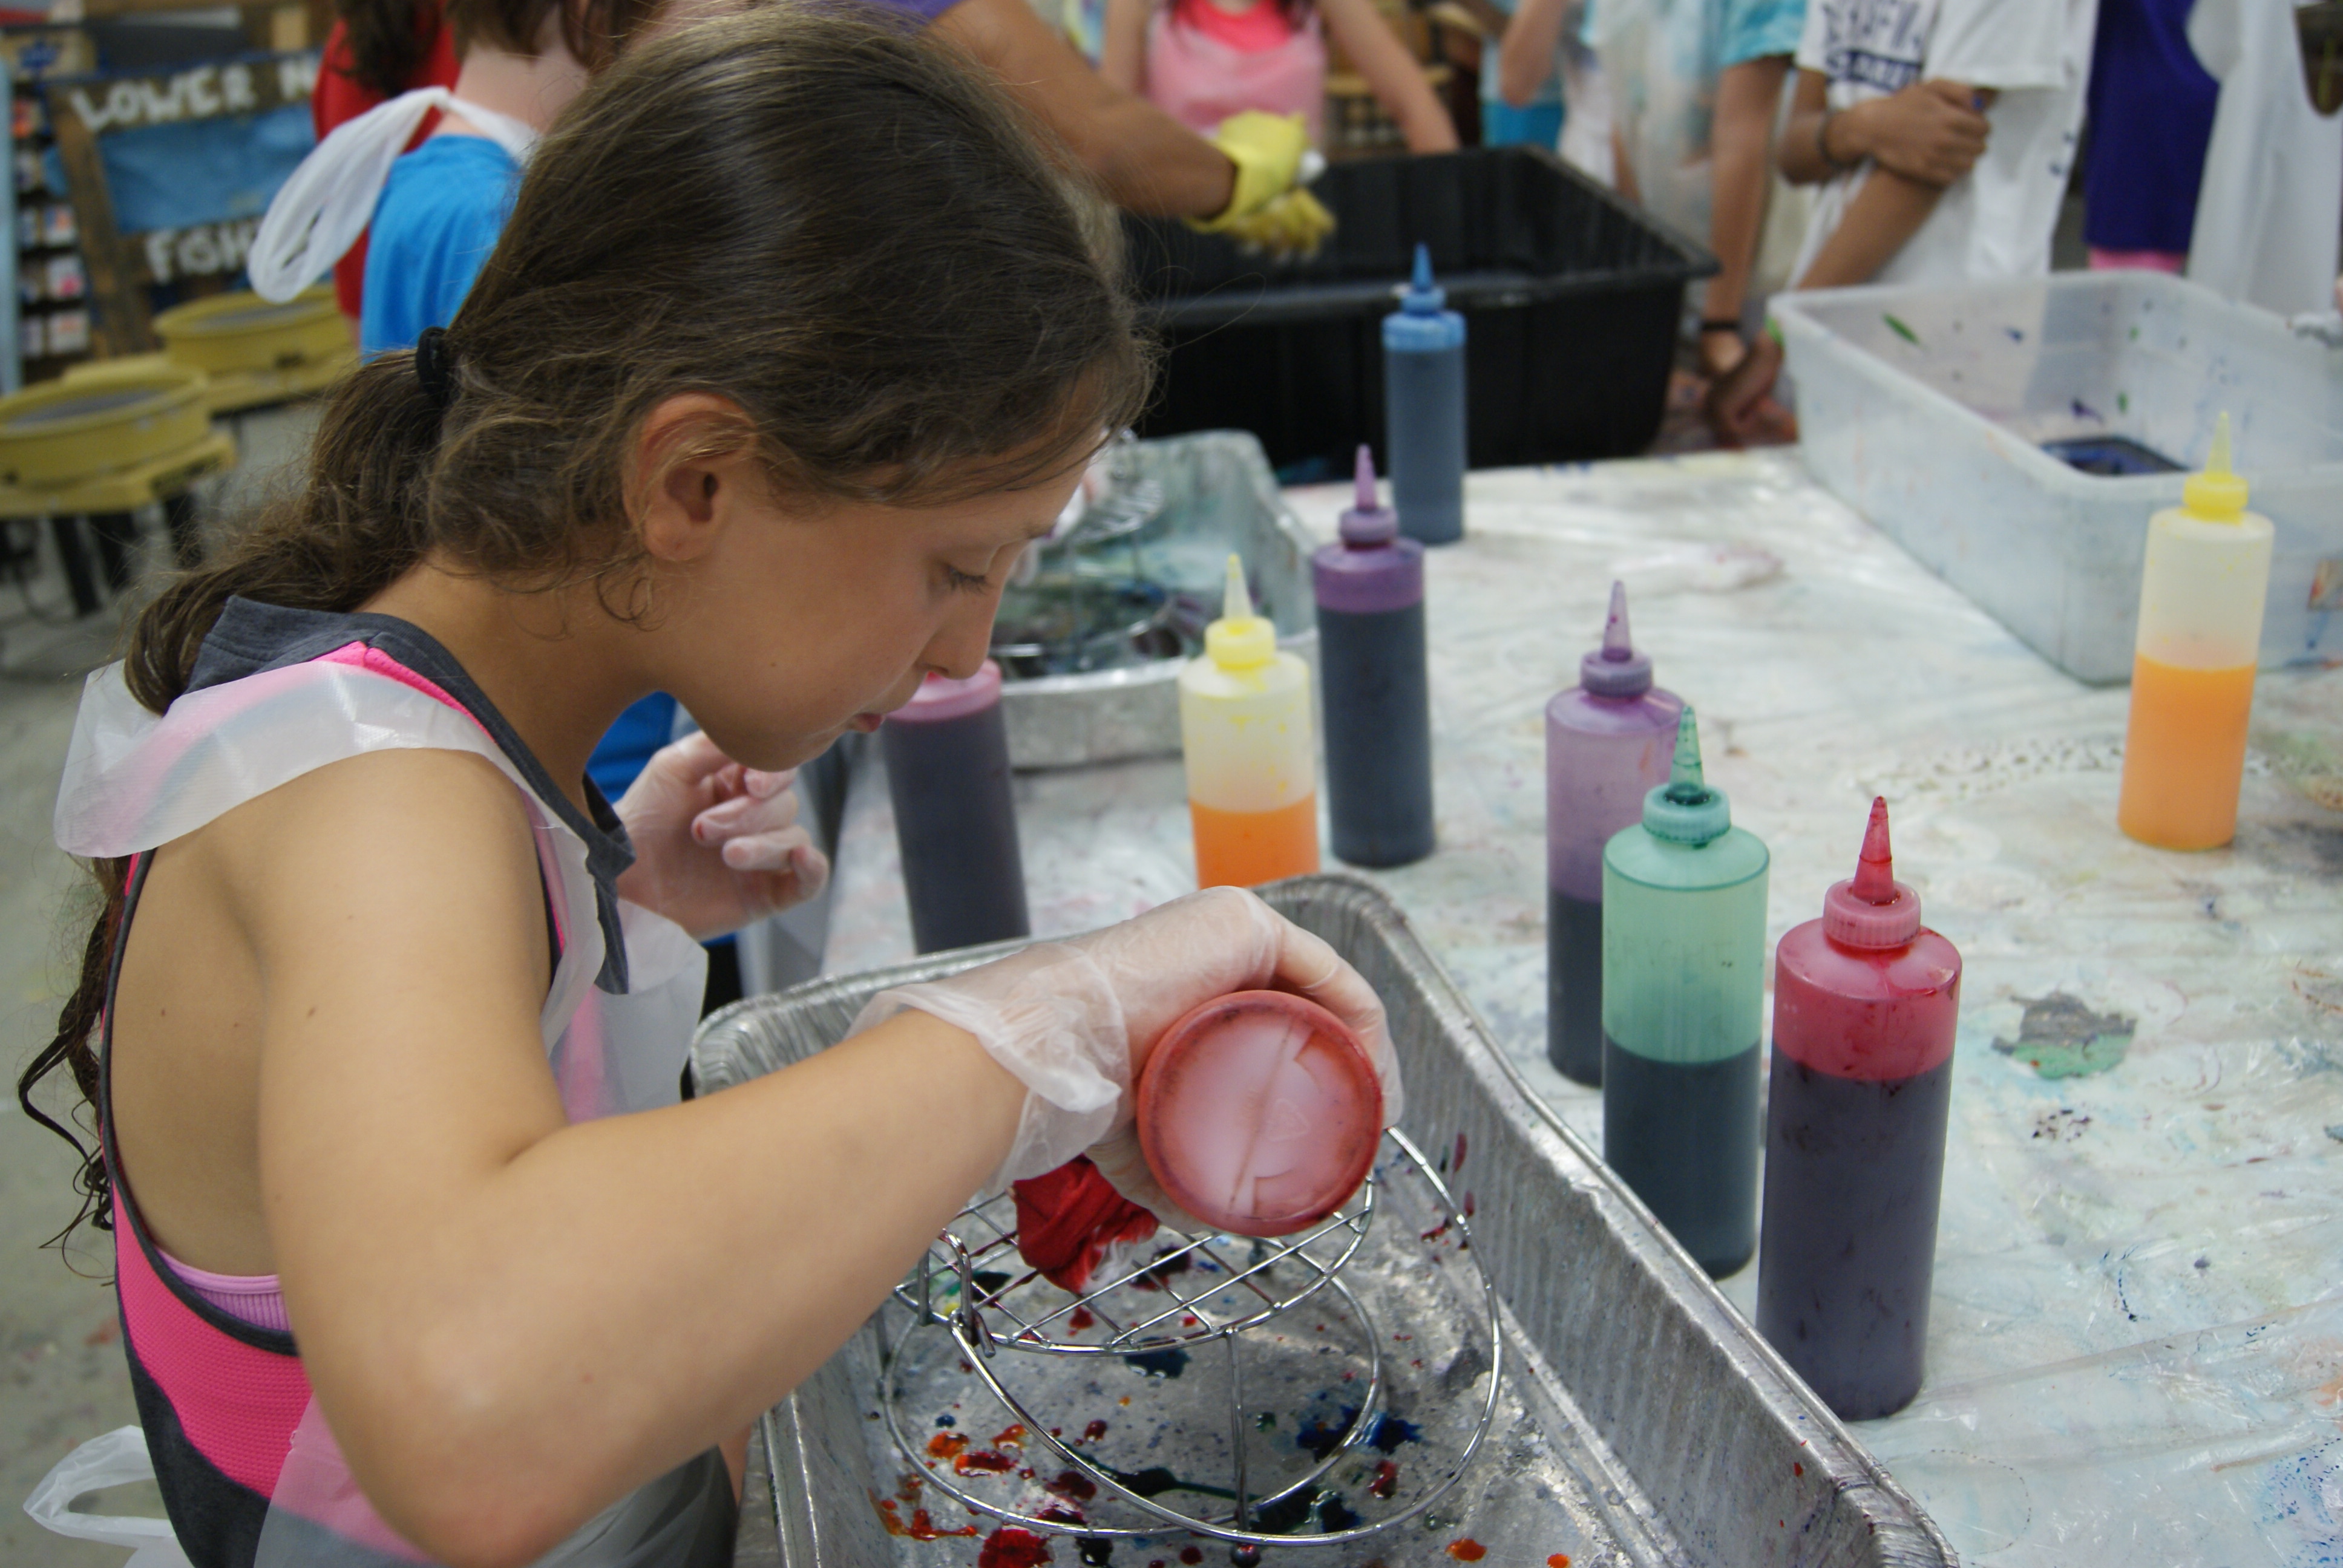
Step 5: Put on your gloves! On each piece of the pizza pie separated shirt, squirt a different color of dye (dye & water & urea). Flip the shirt over and dye an identical design as the other side.
Step 6: Put the shirt in a plastic bag. This slows down the drying process.
 Step 7: Let the shirt sit for 6 hours.
Step 8: Untie the shirt and squeeze out excess liquid. Rinse.
Step 9: Put the shirt in a washing machine and wash with tie dye detergent. Dry normally.
Step 10: Rock your shirt!
Nino is from the Philippines. He is a painter, musician, teacher and athlete. He is an abstract artist, he plays guitars, flute and percussions, and also likes sports like ultimate frisbee, mountain biking, indoor wall climbing and surfing. This is his third summer as the Arts & Crafts Director at Crane Lake Camp!